

This channel is on the Full plans, not on Lite. See the plans
Connect a mailbox so customer emails land in the shared inbox next to your chats, and send email from the inbox or the API.
Before you start
- A mailbox you can send from, with its SMTP details. SMTP is required.
- The IMAP details of the same mailbox, if you want incoming emails in the inbox. IMAP is optional.
- The mailbox username and password. With two-step verification (Gmail, Outlook and others) use an app password, not your normal password.
The mail server must be reachable from the internet. Servers on private addresses (for example 192.168.x.x or localhost) are blocked for safety.
Two modes follow from this: with only SMTP the channel is API only (sending). With SMTP and IMAP it is Inbox + API (sending and receiving).
Provider settings
Common values. Confirm them in your provider’s own help pages, because providers change them.
| Provider | SMTP (send) | IMAP (receive) | Notes |
|---|---|---|---|
| Gmail / Google Workspace | smtp.gmail.com, port 587, STARTTLS (or 465, SSL/TLS) | imap.gmail.com, port 993, SSL/TLS | Turn on 2-step verification and create an App password. Use the full address as username. |
| Microsoft 365 / Outlook | smtp.office365.com, port 587, STARTTLS | outlook.office365.com, port 993, SSL/TLS | Your administrator may need to allow SMTP AUTH and password sign-in for the mailbox. |
| Zoho Mail | smtp.zoho.com, port 587, STARTTLS (or 465, SSL/TLS) | imap.zoho.com, port 993, SSL/TLS | Use an app-specific password if two-factor authentication is on. Use the regional host (for example .eu or .in) if your account is not on .com. |
| Your hosting (cPanel and similar) | mail.yourdomain.com, port 465 SSL/TLS or 587 STARTTLS | mail.yourdomain.com, port 993, SSL/TLS | The username is usually the full email address. The exact host is in the hosting panel under Email Accounts → Connect Devices. |
Security must match the port: 465 and 993 use SSL/TLS, 587 uses STARTTLS.
Connect in KonekSip
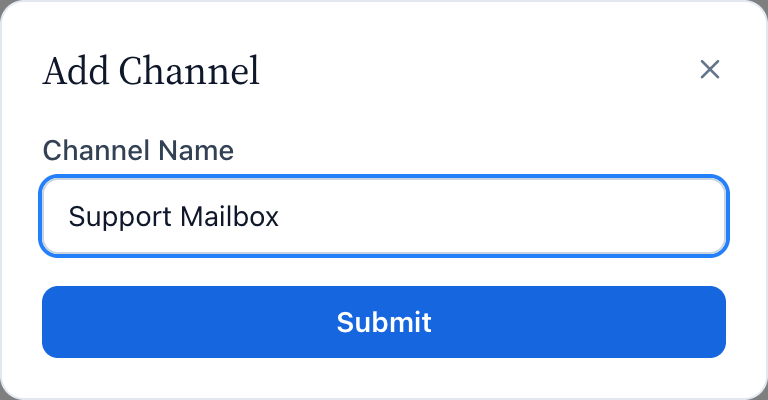
- Open Platforms → Email and press Add Channel. Type a name (only your team sees it) and press Submit.
- Press Mail Server on the new card.
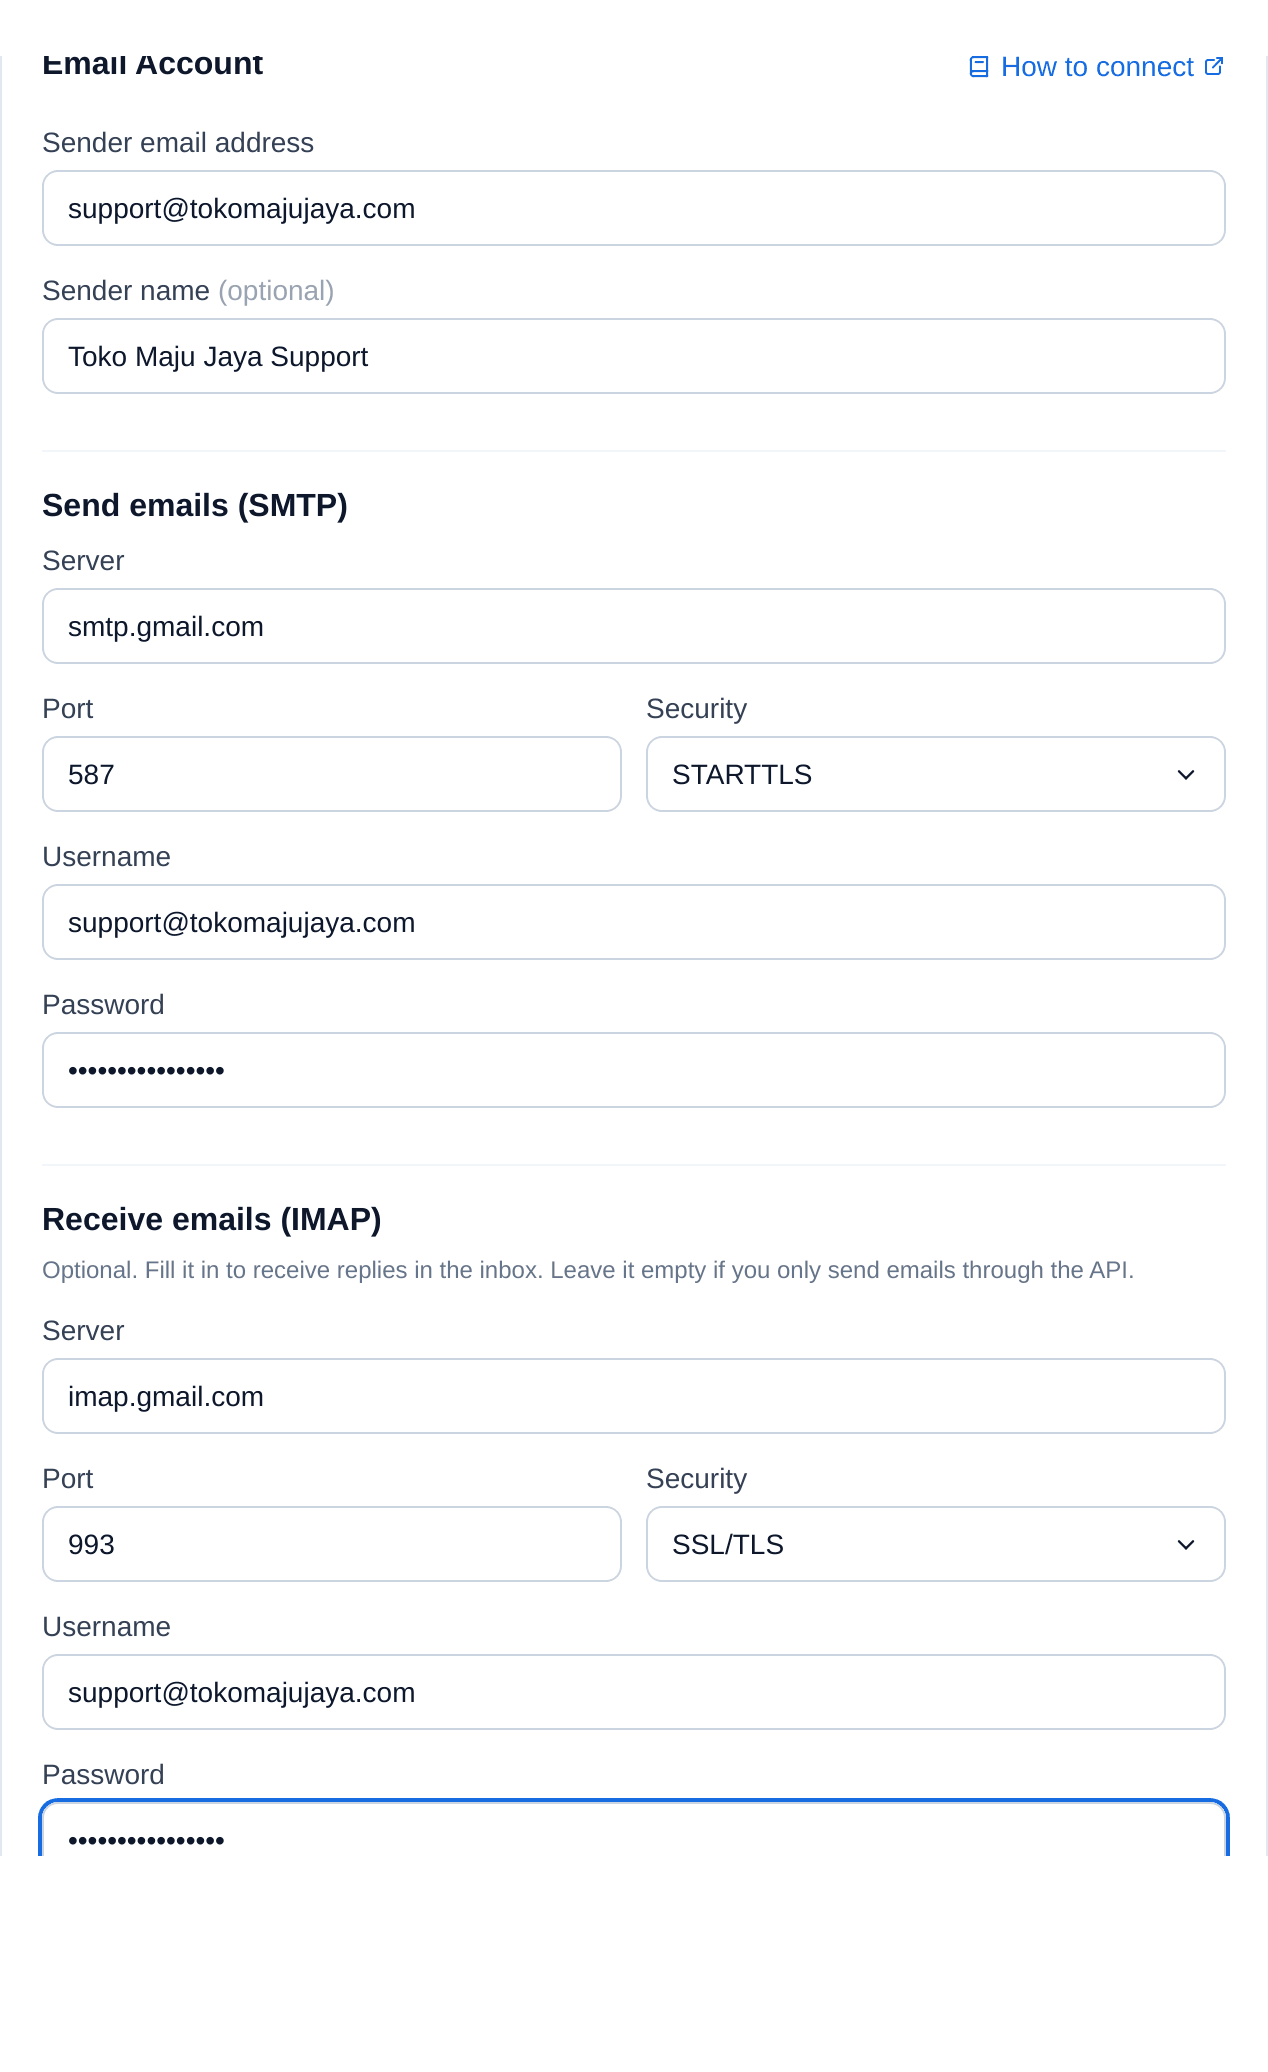
- Enter the Sender email address and, if you like, a Sender name that recipients see.
- Under Send emails (SMTP) fill in Server, Port, Security, Username and Password.
- Under Receive emails (IMAP) do the same if you want incoming emails. Leave it empty for API-only use.
- Press Save & Test Connection. KonekSip logs in to SMTP, and to IMAP when you filled it in.


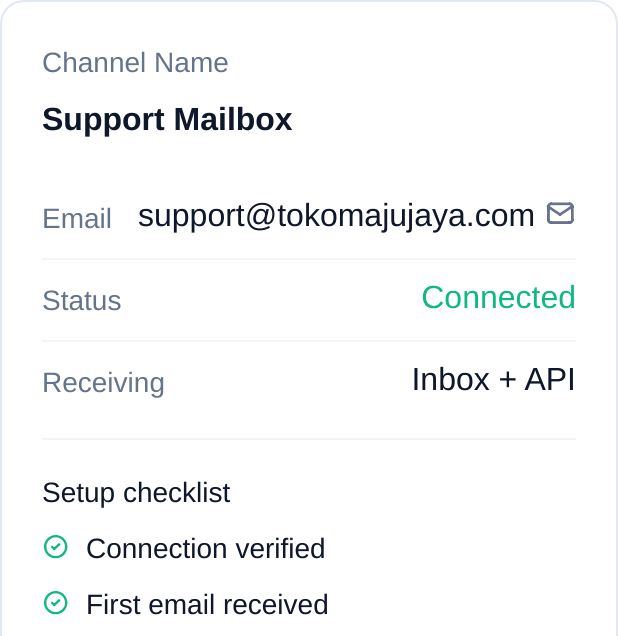
If something is wrong, the message starts with SMTP: or IMAP: so you know which side failed. When it works, the status turns Connected and Receiving shows Inbox + API or API only.

Receiving emails
- KonekSip keeps a connection open to your IMAP server and also re-checks every minute, so a new email normally shows up within about a minute.
- Each sender becomes a conversation in the Inbox, named after the sender address. Replies and new emails stay in that thread.
- Attachments are saved with the message. HTML emails are shown in a sandbox without scripts, and remote images stay off until you choose to load them, which protects you from tracking pixels.
- Every new email is also posted to the channel’s webhook as a
message.receivedevent with an extraemailblock. See the Webhook reference.
Sending emails
- From the Inbox: open the conversation, write the reply and send. It leaves from the sender address you configured.
- From your own system: use
POST /api/send-emailwith the channel’s API key. See Send Email in the API Reference. This works in API-only mode as well. - Email accounts accept only the email endpoint. WhatsApp, Messenger and Instagram endpoints reject them.
Troubleshooting
| What you see | Likely cause | What to do |
|---|---|---|
| IMAP: Login failed. Check the username and password. | Wrong password, or a normal password where an app password is required. | Create an app password at your provider and use it for both SMTP and IMAP. |
| SMTP: authentication error | Same as above, or SMTP sign-in is disabled for the mailbox. | Use an app password, or ask your administrator to allow SMTP sign-in. |
| Timeout or connection refused | Wrong host or port, or the server is on a private address. | Check the host name and port in the provider table. Private addresses are blocked. |
| SSL or certificate error | Security does not match the port. | Use SSL/TLS with 465 and 993, STARTTLS with 587. |
| Sending works but nothing is received | The IMAP section is empty, or IMAP is switched off in the mailbox. | Fill in IMAP, save again, and make sure IMAP access is enabled in the mailbox settings. |
| Emails you send land in spam | The sending domain has no SPF or DKIM records for this server. | Ask your email provider or hosting how to add SPF and DKIM for the domain. |
Need Help?
If you have questions or need assistance, our support team is here to help.